Two things stand out. The first is that so much of what I’ll describe to you would be impossible now. Simply illegal. Against the regulations.
It was the summer of 1971-2 and we were ready to start boat building.
Heather and I were settled in Glen Eden and I had a job teaching in Henderson, both within 15 minutes of the boatyard.
Some time after the 1971 school year finished Ken and Dianne moved up to Auckland and rented a place in Green Bay so they could join us. Ken got a job teaching art at Lynnfield College.
Brian Donovan had a lease arrangement on an old boatyard and slipway called Span Farm, on an inlet up the Whau River in Glendene, and we rented a boatbuilding space from him there.
Over the summer we started work at Span Farm. I say “we”, although Ken reckons they never made it to Auckland until the school holidays were almost over. My solo act was laying out the transverse and profile lines on the big white painted loft floor, and building the timber frames that would define the hull’s shape during construction.
§
Two things stand out from that summer . The first is that so much of what I’ll describe to you would be impossible now. Simply illegal. Against the regulations.
The second is that it was a quick induction to Brian’s practical do-it-yourself and do-it-cheap approach (you might need to do a bit of googling here).
First we built a massive boat shed out of cheap, rough-sawn untreated pine. The roof trusses were made of pretty decent timber, but the roof was clad in second hand corrugated iron and must have been at least 20’ (6m) off the ground. There was no way we could afford substantial posts to hold it up, and why spend the money — who had the money? — so under Brian’s direction we used 4x2s (10x5cm) instead. Not all of those were long enough either, or had knots, so we skew-nailed lengths together side by side with 4” nails to make 4×4 posts — being very careful to ensure that the knots and joins in the two 4×2 pieces didn’t align. Skew nailing is a very important skill for us bush carpenters. The posts were secured to the ground with No. 8 Wire, that icon of New Zealand ingenuity. The structure was braced with light pine and No. 8 wire, the latter tightened with Spanish Windlasses.
It was my first lesson in structural integrity. The structure doesn’t need to be heavy, Brian said. As long as the diagonal bracing, which is what gives the structure rigidity, is consistent and set up in opposing pairs, so that when the wind blows one of them is always in tension — resisting the wind’s force by pulling back against it — it didn’t matter that the opposing brace is too light to push against it.
And the finished structure was strong. Despite its height it never looked unstable. And It stood up to the wind. We even attached the wooden hull frames to the roof beams while we built and plastered the ferro armature beneath them. It was ugly, jerry built, and at the same time, like everything Brian did, an elegant solution.
Next question, how do you erect those bloody portals — meaning the roof trusses and the posts they stand on? Especially the first one? Rough answer: gather a few mates, with someone confident to take charge. Position the first portal on the ground with its feet where you want them to stand once erect. In front of it, stand up a pole with a block and tackle running to the top of it, and rope running from the pole to the top of the portal. More ropes attached to the sides of the truss to stop it falling forward or back when you’ve stood it up. Now have your mates lift the truss while you haul on the block and tackle. This pulls the pole down to the ground and simultaneously raises the portal. As it goes up, help it along by pushing it with timber props. Once vertical, hold it there with the ropes while you brace it temporarily. And so on. As you go, you can use the sections you’ve raised to erect and brace the remainder.
(You should have seen us using similar methods in the Solomon Islands a few years later to raise the massive prefabricated steel portals of a warehouse we were erecting. No one got hurt, but my father happened to be watching, and he thought that that was more through good luck than good management.)
Next, how do the two teachers complete the roof structure and add the roofing iron? I hate to think. Well, while standing on planks spanning the roof trusses, that’s how. Anyway, we survived. I do remember we had a beautiful extension ladder that was around for years. Finally, we clad it part way down with polypropylene sheet to provide shelter while we worked on the boat.

§
The point is that this massive structure cost us very little, and we built it ourselves. Today we wouldn’t even be able to afford the scaffolding. We got around that problem by not having any.
Actually that’s not quite true — we needed scaffolding planks to work on the hull. But there was no way we’d settle for the bouncy, expensive planking that ordinary builders used. Instead we made our own out of 10×1 rough sawn pine, with 4x1s or 3x1s nailed along their edges to stiffen and strengthen them, and supported them off the boat shed posts.
As the saying goes, a country has as much regulation as it can afford. Or as an old friend who likes a bon mot put it today, about something completely different, “Man is born free but everywhere there are walls.”
.§
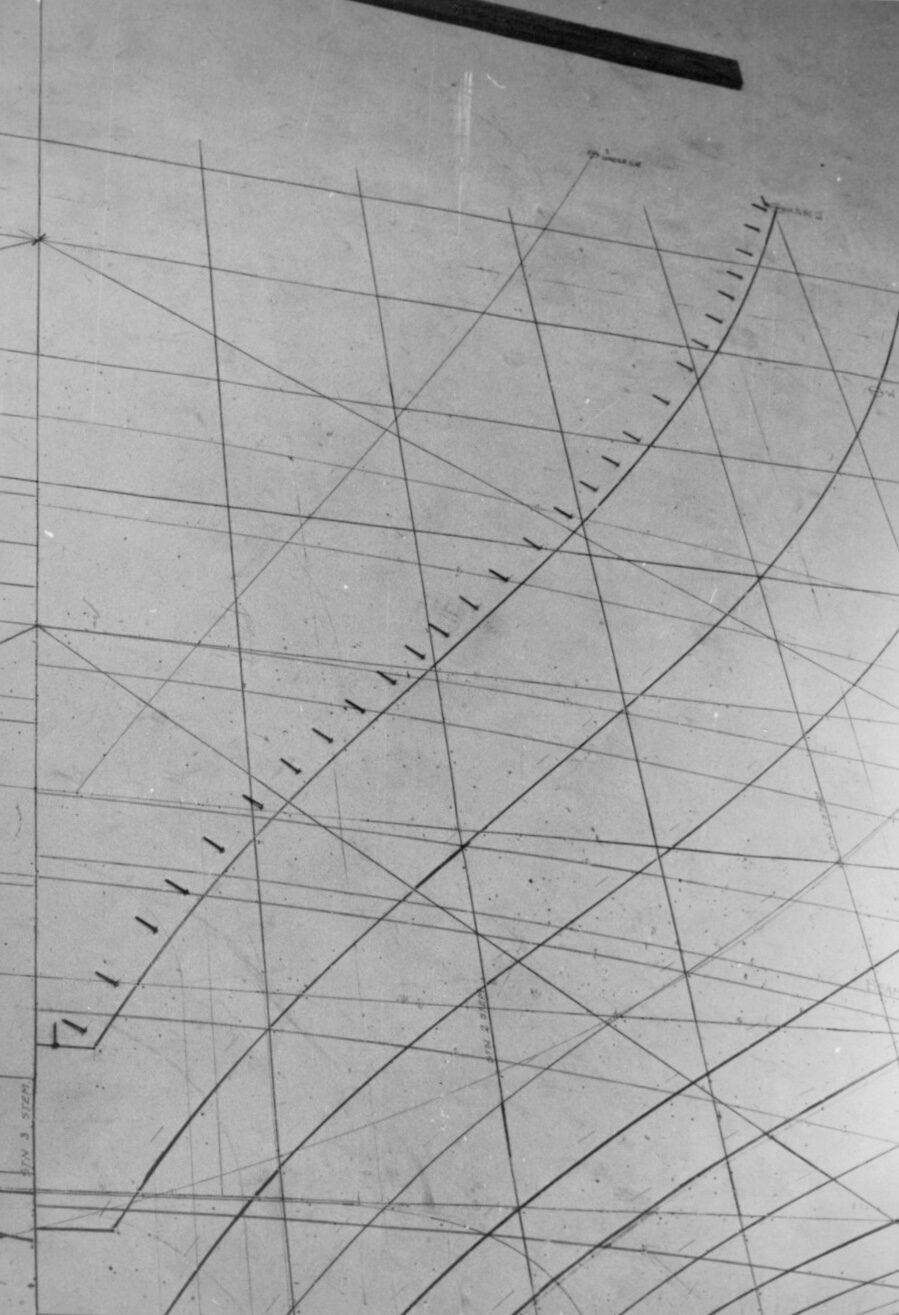
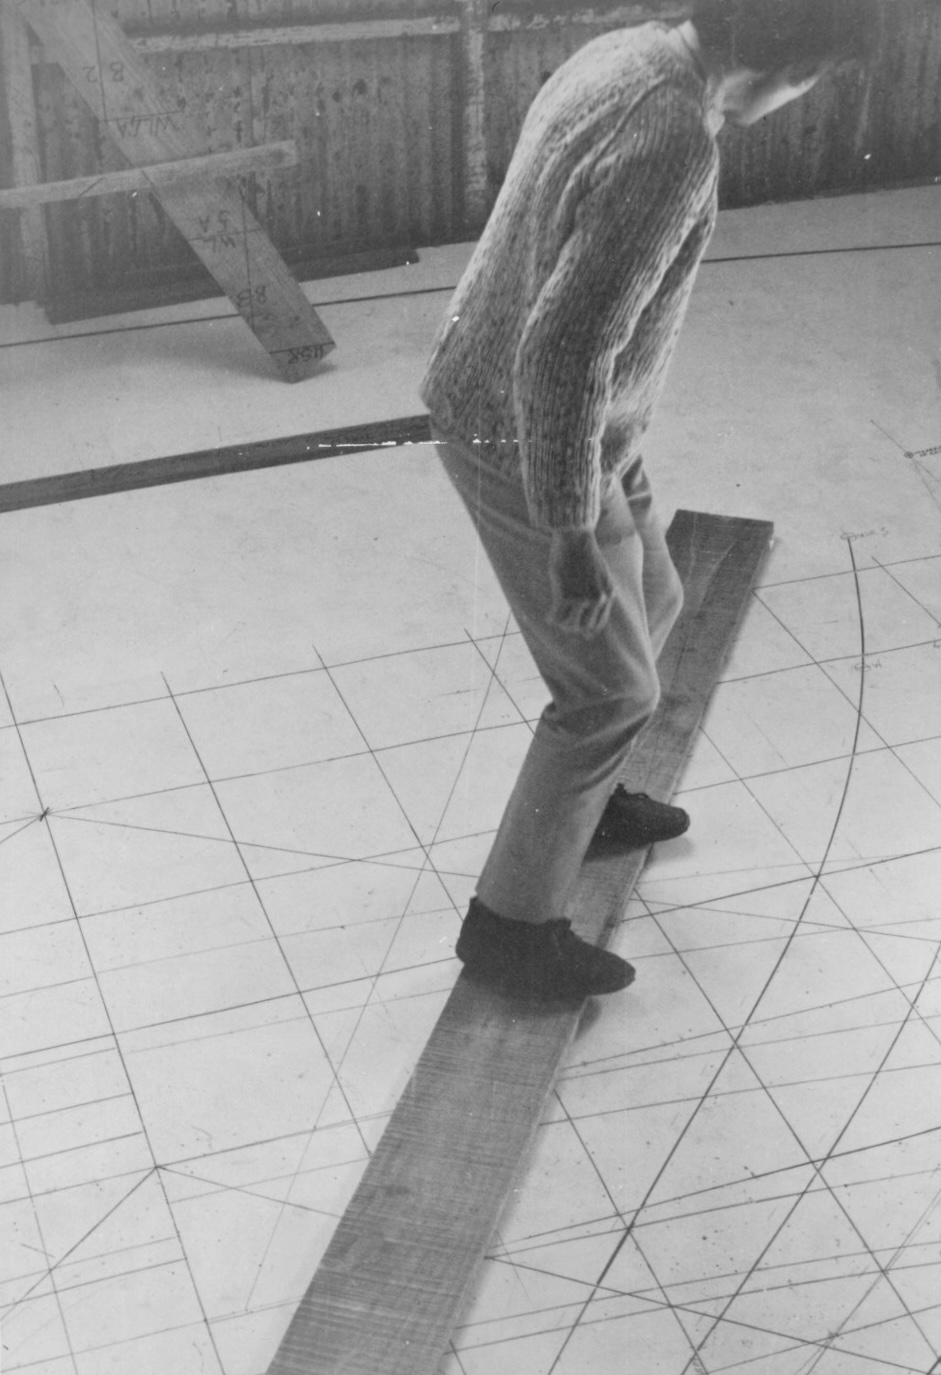
Meanwhile I’d drawn Brian’s lines full size on the white loft floor. Marked out Brian’s offsets (vertical and horizontal measurements) to define the shape of the transverse frames, as well as the bow and stern profiles. Used a light steel rod wrapped round nails in the floor to draw the curves with a black felt marker, and to even out any irregularities as the offsets were scaled up.
Those lines represented the outside of the hull. To make the frames, the thickness of the hull had to be deducted and marked with a spacer and pencil, then clouts laid on the marks, one side of their flat heads hammered over in a vice. The inch-thick pine timber for the frames could then be laid over the clouts and stamped to embed them in the soft timber, and the lines on the floor replicated in the wood.
That done, the boatyard’s massive old bandsaw made short work of cutting the pieces of frame mould so they could be laid back down on the floor and nailed together.
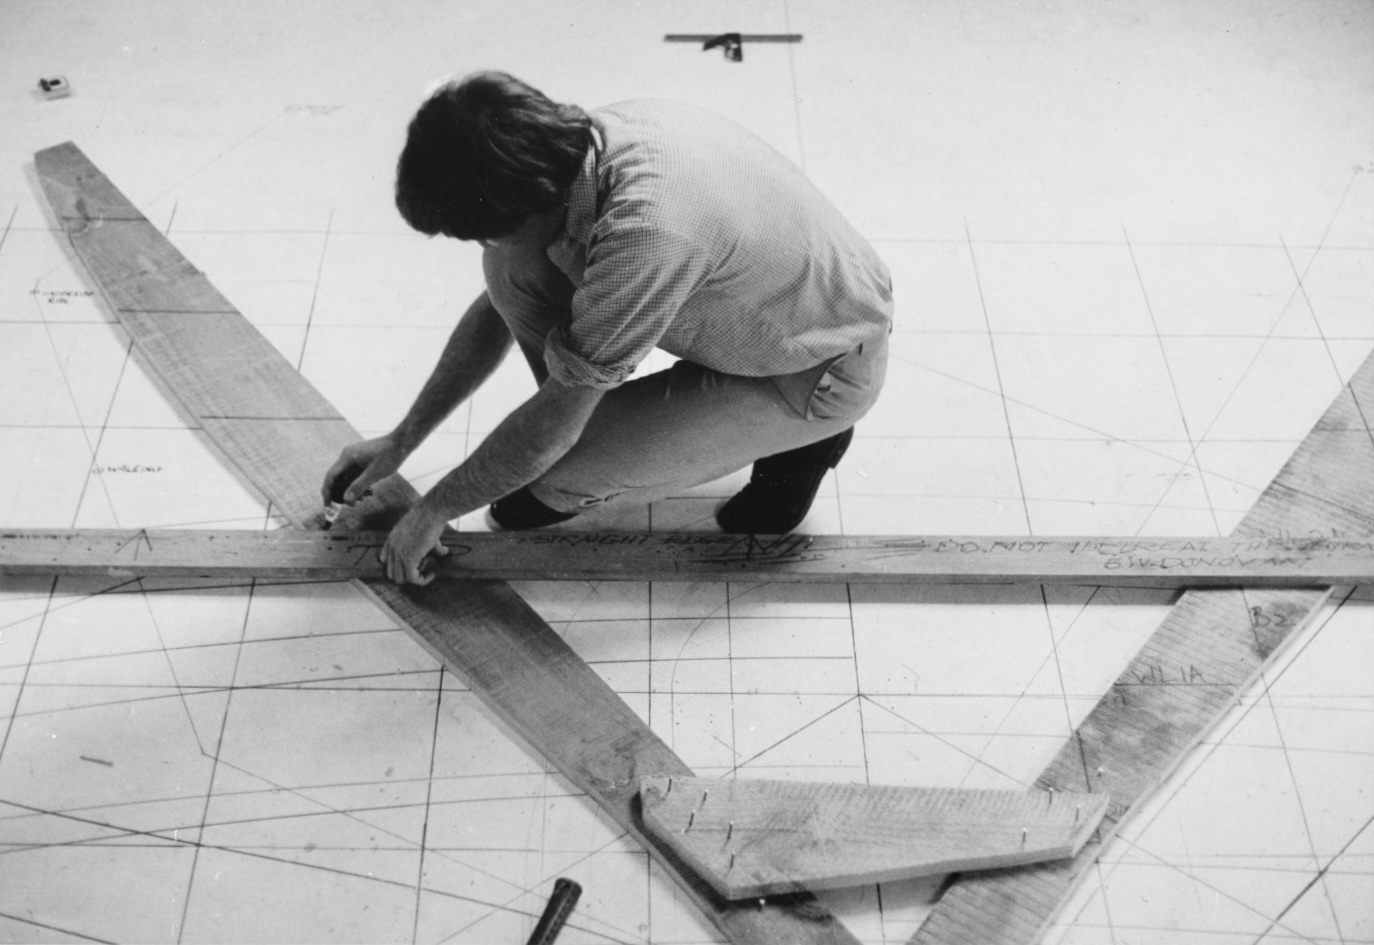
Those timber frames, made of inch-thick planks cleated together as necessary, were another of Brian’s gifts to us. Most ferro boats were built on 3/8” welded rebar frames, Hartley’s for example, but we didn’t have the skills for that. And Brian’s boats were built on the eggshell principle — those curves weren’t just beautiful, they were structural. He’d use eggs to illustrate. It was their shape that gave them strength. Transverse frames were an unnecessary weakness, like bending a piece of kindling over your knee. So the only frames in the upper hull were to attach bulkheads, and there were no slab sides in a Donovan design.
The structural demands on the sub floor structure were different. There was regular transverse framing, as well as longitudinal for engine mounts etc. But all this internal framing was built after the hull was complete. In the hull stage all that was required was to insert starter rods and mesh into the armature.
§
Finally, with the shed up and the frames built, we could shape the keel, made up of 1/2” steel plate and 1” bars, and set it up on old railway sleepers. Next came the steel defining the bow and stern profiles, and the stern tube for the propellor. To do all this Ken learned gas cutting and arc welding.
Finally we could set up and brace the wooden frames ready to start applying the mesh and steel rod reinforcing of the hull armature.
If all that sounds like a lot of work, it was, and we’d barely started. Barely started? It would take years for the truth behind that statement to fully sink in.
But already, with the frames and profiles up, we could picture our beauty’s curves.
To me this was almost magical. To have watched Brian hunched over his drafting table, in his car case office, drawing those curves on drafting paper with weighted splines — taking the offsets with a scale rule — and now to have replicated them full size in our pine frames.
That fascination, or captivation, took over my life — our lives — for the next ten years.
§
Brian had come around regularly to see how we, and the others building at Span Farm, were doing. “It’s easy!” he’d say, with a bellowing laugh, and show us how. We depended too on the physical infrastructure of the old boat yard — the band saw, for example, and the lofting floor.
And my respect for Ken deepened — teaching himself those new skills and applying himself to the job. Brian might say it was easy, but it wasn’t, and over the years I’d get to see a lot of bad workmanship. Not on our boat.
§
By then summer was well and truly over and we were both teaching. From then on it was weekends and holidays only in the boatyard. But we were up and running.
A thoroughly clear account of a remarkably complex process made possible by Brian’s confidence and his support. I continue to have enormous respect for the splendid work you did to loft up the hull and then build the wooden frames so that on our arrival in Auckland. More recently, I have often sat, at sunset, on the huge stone wall at Arles that overlooks the great river Rhone to reminisce on the activities described here. A magical combination of youthful naivety, practical intelligent innovation, grit, hard labour and team work.